How HagoLaser works
A quick tour of the whole program — from a drawing in Inkscape to a finished piece — and why the workflow was designed by jewelers who use it every day.
The workflow, end to end
You never touch machine code. You draw, you assign colors, you pick the material, you fire the laser. HagoLaser turns your drawing into the exact commands the DLC2 board understands.
Draw your piece as an SVG (free software). Use flat colors to mark what each line should do.
Black cuts the inside, purple cuts the outside, blue engraves. Open it in HagoLaser and it reads the colors.
Choose e.g. "Silver 0.8 mm" and every color loads its recipe: power, speed, passes, frequency.
Line up the piece with the red light, press the pedal (or the Mark button), and the laser does the rest.
The color system — the heart of it
This is what makes HagoLaser fast: the color of each line in your drawing decides what the laser does with it. No layers to configure, no menus to dig through — the drawing is the job.
holes, windows, the inside of letters
the outline that frees the piece, cut last
surface detail, text, textures, logos
You can assign any color to any operation and add more — these three are just the defaults the installer sets up in Inkscape for you.
A wedding pendant: purple outline (cuts it free), black bail hole (inner cut), blue engraving — the initials and interlocked rings.
Inkscape: the practical part
You draw in Inkscape, which is free. Three things nobody tells you on day one:
The installer leaves a “HagoLaser” palette inside Inkscape, but it does not select itself. At the right-hand end of the color strip along the bottom of the window, click the small arrow and pick HagoLaser. The first three swatches are labelled with what they do.
What you draw 20 mm wide is marked 20 mm wide. The document is the workpiece, not a canvas you scale later.
We keep a single SVG loaded — ours is simply called 1.svg. Draw the next job in that same file, save, and press Mark. No re-importing, no export step.
HagoLaser re-reads the file from disk every time it marks, and it stays loaded between sessions. So the loop is: save in Inkscape → press Mark in HagoLaser. If what comes out is the previous design, you simply did not save.
The marking screen
Pick material and thickness at the top; the table below fills with every color found in your design, each with its power and passes — tick which ones to run and in what order. A live timer shows how long it's taking; one button stops everything.
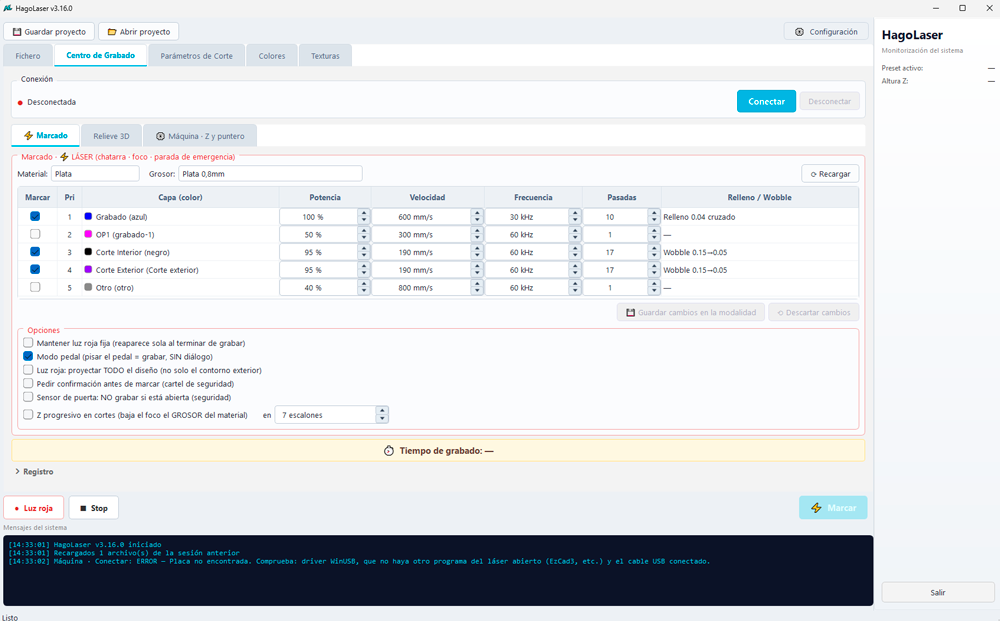 📷Screenshot: the “Marking” tab — material/thickness, the color-layer table and the options.
 img/marcado.png
Materials & recipes library
Every material and thickness is a recipe. HagoLaser imports the ones you already calibrated in EzCad3 on the first run, and you can create, edit and fine-tune your own — power, speed, frequency, number of passes, and even multi-phase cutting (a wide first pass to open the groove, finer passes to finish).
- Silver, gold, brass, steel… one recipe per thickness.
- Each color/operation carries its own parameters.
- Multi-phase cutting for clean edges in precious metal.
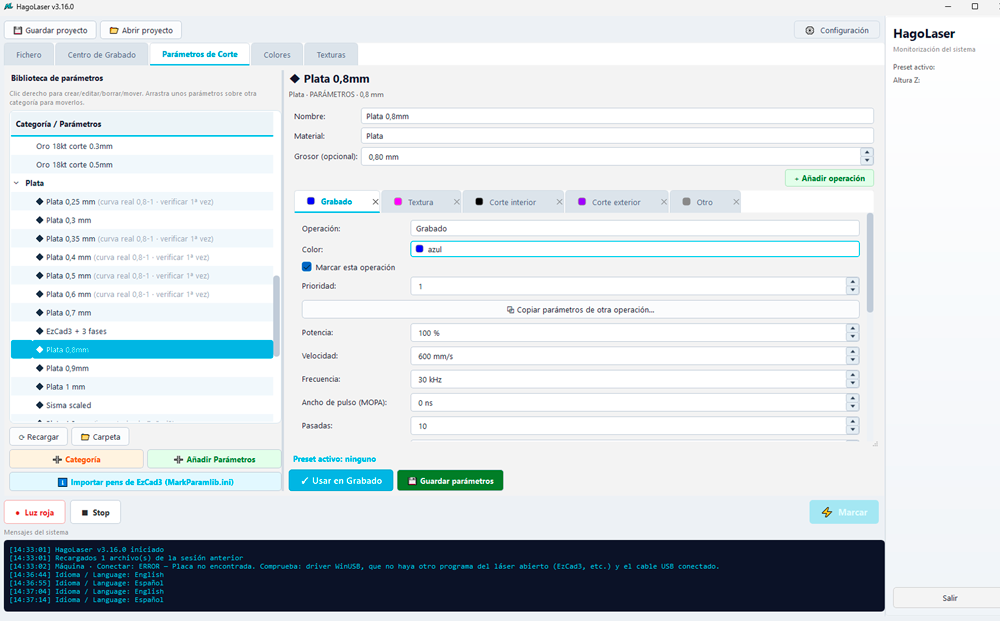 📷Screenshot: the material/modality editor with the parameters per operation.
 img/modalidad.png
Jewelry-grade cutting
Cutting thin precious-metal sheet cleanly is hard. HagoLaser handles the things that matter at the bench: spiral wobble to widen and clean the kerf, a progressive Z descent that lowers the focus into the material as it cuts, and true focus management read from your own machine — so the cut stays sharp all the way through.
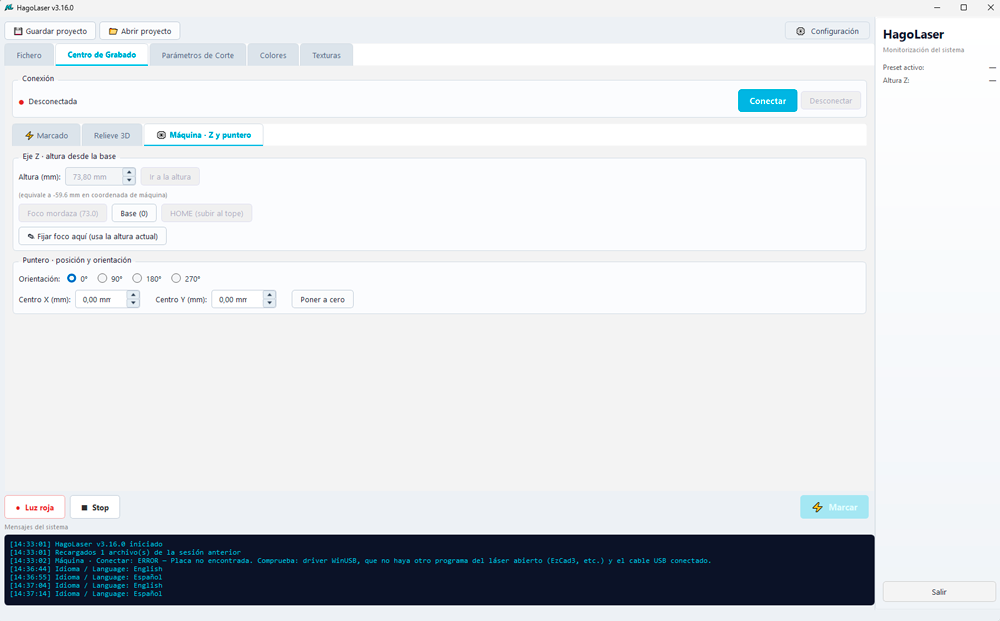 📷Screenshot / photo: a clean silver cut (or the Machine · Z tab).
 img/corte.png
3D relief from STL · coming soon
Load any STL and HagoLaser turns it into a low relief, engraved layer by layer with the motorized Z axis — the kind of depth EzCad3 does poorly and most software can't do at all. It's the module we're finishing next; you'll see the preview inside the app already.
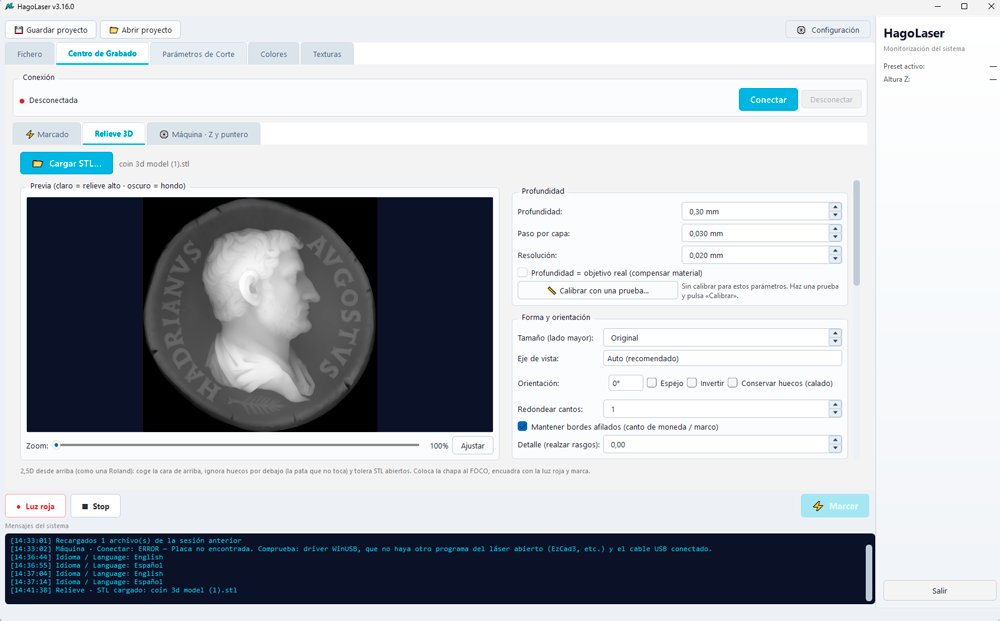 📷Screenshot: the “3D Relief” tab with an STL preview.
 img/relieve.png
Red light, pedal & safety
A steady red pointer shows exactly where the laser will fire — a single spot or the whole design projected onto the piece, so you frame it perfectly before marking. Fire hands-free with a foot pedal, and turn on the door-sensor lock if you want the laser to refuse to fire with the lid open.
Set up in one minute
The first time you open HagoLaser, a wizard does the boring part for you: it finds your EzCad3 and imports your calibrated parameters and real focus, installs Inkscape and the HagoLaser color palette if you don't have them, and checks the USB driver. Then you're marking.
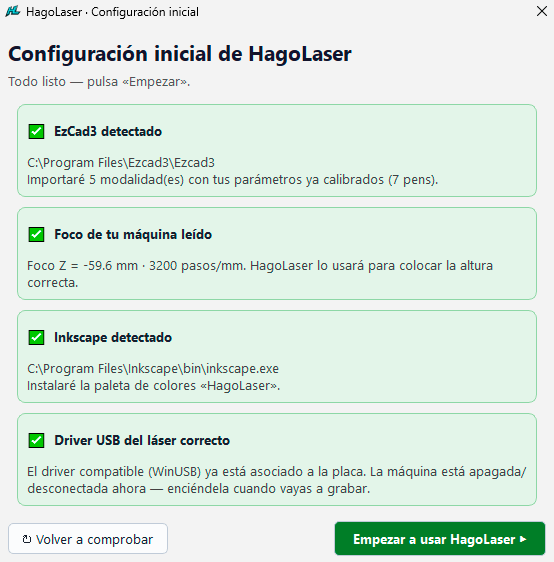 📷Screenshot: the first-run wizard with its four green checks.
 img/asistente.png
Free to download, free to use
1-year free license, renewable. Try everything for 7 days.
⬇ Download HagoLaser